Tag: green chili

  • Super Yummy Beef Enchiladas


    Go to Recipes > You’ll Want This One.

    As I’ve said before, I cook for picky eaters—#MyKids. There are only a few meals that every single member of my crew will eat without complaint, and this is one of them: Beef Enchiladas. Well… technically it’s Cheesy Beef Green Chili Enchilada Stacks—but who’s got time for that name?

    Let’s just call them Beef Enchiladas and move on.

    They’re a little different than your standard rolled-up, red-sauced version. Truth is, I only like my mom’s red chili. She makes the ultimate savory-spicy red chile that I haven’t figured out how to replicate (Mom, if you’re reading this—help a girl out!).

    So instead, I make mine using our generations-old family Pork Green Chili recipe—and let me tell you, it does not disappoint.

    Once that chili is simmering and smelling like heaven, brown your ground beef. Then it’s time to build those stacks. Cut up about 10 corn tortillas into strips and layer them across the bottom of your baking dish.

  • Chili Cheese Eggs

    Share

    chiles
    YUM. I must start this post off by telling you how totally in love I am with green chiles, you know the kind, especially if you are from Colorado or New Mexico. These are special green chiles and come from New Mexico and Southern Colorado.

    They come in varieties like Pueblo, Dynamite, Hatch, Pueblo Mosco – those are the best ones. Usually in late Summer through the Fall you will see stands all over Denver, all equipped with these huge roasters. As soon you step out of your car the aroma is heavenly.

    All this to say, I want to share one of my favorite recipes. I make this recipe for Bible Study, our Moms Group, a ministry meal and as a family favorite.

    2 (16 ounce) packages shredded Cheddar
    cheese **I used Mexican combo – monterey, colby, etc***
    2 (4 ounce) cans chopped green chile
    peppers, juice reserved
    12 eggs *** I used 17 and would recommend more than 12**

    DIRECTIONS:
    1. Preheat oven to 350 degrees F (175 degrees C).
    2. In a 9×13 inch baking dish, place 1/2 of the shredded Cheddar cheese. Top with green chile peppers. Top the chiles with the remaining cheese.
    3. In a blender, mix eggs with the juice from the chile peppers. Pour the egg mixture over the cheese mixture.
    4. Bake in the preheated oven 30 to 40 minutes. Cool before cutting into squares.

  • Fresh Roasted Hatch Green Chili, a Family Staple

    Hatch Green Chile Roasted

    Our favorite Hatch green chili and Pueblo green chili stand.

    It is that time of year again!  Every August we buy bushels of fresh roasted Hatch Green Chili’s and Pueblo Green Chili’s.  Oh, and you can have fresh garlic added to your green chili batch when they roast it too! We freeze the chili’s for year around family favorites. We have countless family recipes that call for this wonderfully, delicious green chili.  Anything from egg relish to my Grandma’s Chili, to my Mom’s famous Smothered Burritos and my green chili chicken burritos, we use it for possibly any meal of the day.  It is amazing chopped, with garlic salt and slapped on your favorite sandwich.

    The tradition of waiting for the perfect Fall Saturday afternoon and then finding our favorite Hatch Green Chili stand setting up their familiar yellow and white tent – the anticipation is palatable.  Not only does it conjure up thoughts of delicious meals but I can’t help but think of the seasons and activities to come.  Cooler weather with brisk air and blue skies, changing leaves, football Sundays, Fall Festivals, apple pies… then Christmas!  We make sure and buy enough Hatch Green Chili to last us through next August… which it never does.  The more we buy, the more we eat!
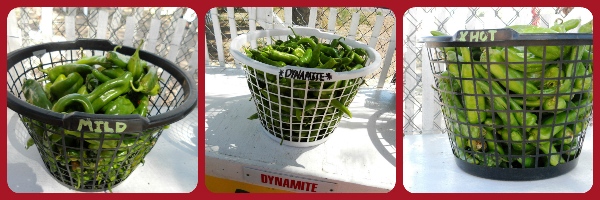
    Hatch Green Chile Roasted

    Check out my recipe page for recipes using roasted green chili’s.
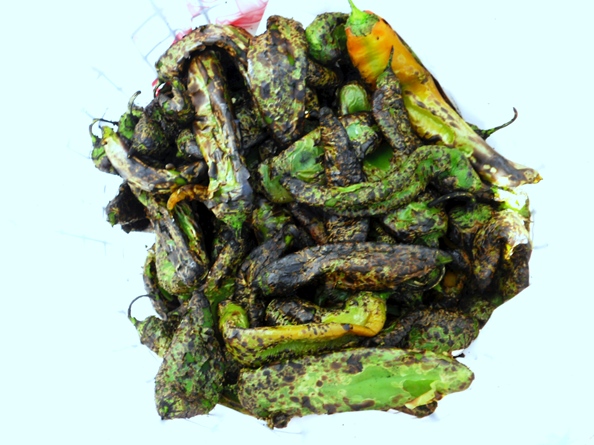
    Hatch Green Chilis

    Don’t miss out! Get Hatch green chili or your favorite type of green chili while it’s in season.

    Want to know what to do when you bushels of roasted chilis?

    1.  The bushels are usually already assemble, let the roaster which kinds you want (Med, Mild, Hot, Mixed).  You usually get a discount for buying more.

    2.  After they roast them, they tie them up in a plastic bags.  Let those sit in the closed bag for at least 4 hours.

    3.  Have plenty of freezer bags on hand, I buy the sandwich sized ones.  I put 6-8 chilis in each bag.

    4.  When you are ready peel the chilis, rinse and put them in the freezer bags.  Do NOT put the skins down your drain, make sure you throw away in the trash. I used a strainer, under the faucet to peel and rinse the chilis.

    5.  When closing the bags make sure you get all the air out.  Label your bags and throw them in the freezer.